Seafile, Your Self-Hosted Dropbox Alternative


Sync and share files seamlessly across devices! Seafile is a self-hosted providing access to your home cloud storage from various platforms, including mobile devices. It’s free, open-source, fast, and reliable. Seafile supports encryption and saves bandwidth with delta sync, updating only changed file chunks, not entire files.
This chapter assumes you’ve already set up your home server with basic and advanced security measures, including secure remote access.
What about Nextcloud or Syncthing?
Nextcloud stands out as a popular, feature-rich file sync solution. It offers many features like contact management, video conferencing, webmail, and calendars. However, file syncing may be relatively slow.
Syncthing is a decentralized file sync solution. It doesn't require a central server or database, unlike Seafile and Nextcloud. However, file syncing might be comparably slow and, depending on your network setup, could lead to firewall issues.
Can't I just use my current cloud storage?
If you trust commercial cloud providers with your private data, consider this: They can access your data and share it with third parties. Despite claims, services like iCloud, GDrive, Dropbox, or OneDrive keep copies of the keys protecting your privacy.
| Cloud provider | Privacy policy extracts |
|---|---|
| Apple iCloud | “Messages in iCloud also uses end-to-end encryption. If you have iCloud Backup turned on, your backup includes a copy of the key protecting your Messages. This ensures you can recover your Messages if you lose access to iCloud Keychain and your trusted devices.“ |
| Google Drive & WhatsApp | “Media and messages you back up aren't protected by WhatsApp end-to-end encryption while in Google Drive.“ |
| Dropbox | “To provide these and other features, Dropbox accesses, stores, and scans Your Stuff. You give us permission to do those things, and this permission extends to our affiliates and trusted third parties we work with.” |
| Microsoft OneDrive | “When you use OneDrive, we collect data about your usage of the service, as well as the content you store, to provide, improve, and protect the services. Examples include indexing the contents of your OneDrive documents so that you can search for them later and using location information to enable you to search for photos based on where the photo was taken.” |
Database
Deploy Seafile with diverse databases like MySQL, MariaDB, PostgreSQL, etc. This tutorial focuses on generating MySQL databases for Seafile's server components.
Step-by-step guide
Log into MySQL as root:
sudo mysql -u root -p
Run the command below to create the MySQL user seafileadmin (adjust accordingly). Make sure to replace the string StrongPassword with a strong, unique password:
CREATE USER 'seafileadmin'@'localhost' IDENTIFIED WITH mysql_native_password BY 'StrongPassword';
Next, generate databases required by Seafile and grant correct permissions:
CREATE DATABASE ccnet;
CREATE DATABASE seafile;
CREATE DATABASE seahub;
GRANT ALL ON ccnet.* TO 'seafileadmin'@'localhost';
GRANT ALL ON seafile.* TO 'seafileadmin'@'localhost';
GRANT ALL ON seahub.* TO 'seafileadmin'@'localhost';
FLUSH PRIVILEGES;
EXIT;
Log back into MySQL as the user seafileadmin (adjust accordingly):
sudo mysql -u seafileadmin -p
Make sure all databases have been created correctly:
SHOW DATABASES;
The output should look similar to this:
+--------------------+
| Database           |
+--------------------+
| ccnet              |
| information_schema |
| performance_schema |
| seafile            |
| seahub             |
+--------------------+
5 rows in set (0.01 sec)
Exit MySQL:
EXIT;

Installation
Resolve all dependencies and install Seafile on your Ubuntu 24.04 server.
Step-by-step guide
Prerequisites
Seafile requires Python to run, install it on the server:
sudo apt install python3 python3-{dev,setuptools,pip} libmysqlclient-dev ldap-utils libldap2-dev python3.12-venv memcached libmemcached-dev libffi-dev
Create and activate a virtual environment (venv) to keep modules separate from the files installed by Ubuntu's system package manager:
sudo mkdir /var/www/seafile
cd /var/www/seafile
sudo python3 -m venv python-venv
source python-venv/bin/activate
sudo chown -R gofossadmin:gofossadmin /var/www/seafile
Next, deploy packages into the active virtual environment:
pip3 install django==4.2.* future==0.18.* mysqlclient==2.1.* pymysql pillow==10.2.* pylibmc captcha==0.5.* markupsafe==2.0.1 jinja2 sqlalchemy==2.0.18 psd-tools django-pylibmc django_simple_captcha==0.6.* djangosaml2==1.5.* pysaml2==7.2.* pycryptodome==3.16.* cffi==1.15.1 lxml python-ldap==3.4.3
Installation script
Check the latest release of Seafile's Server for Linux. At the time of writing, it was 11.0.13. If not already the case, make sure to move to /var/www/seafile, then download and decompress the package with the following commands (adjust the version number accordingly):
cd /var/www/seafile
sudo wget -4 https://download.seadrive.org/seafile-server_11.0.13_x86-64.tar.gz
sudo tar -xvf seafile-server_*
sudo mkdir installed
sudo mv seafile-server_* installed
Run the installation script:
sudo bash seafile-server-11.0.13/setup-seafile-mysql.sh
Follow the on-screen instructions:
| Instruction | Description |
|---|---|
| Server name | Choose a name for the Seafile server. For the purpose of this tutorial, we'll choose gofoss_seafile, adjust accordingly. |
| Domain | Provide the domain name used by the cloud storage. It's the same address as the web interface we'll set up later on. For the purpose of this tutorial, we'll choose https://myfiles.gofoss.duckdns.org, adjust accordingly. |
| Port | Choose the TCP port used by Seafile. The default value is 8082. |
| Databases | Use the existing ccnet/seafile/seahub databases, which were created previously. |
| Host of MySQL server | The default value is localhost. |
| Port of MySQL server | The default value is 3306. |
| MySQL user | Provide the name of the MySQL user. In our example, that's seafileadmin, adjust accordingly. |
| Password of MySQL user | Provide the password of the MySQL user. |
| ccnet database name | Provide the name of the ccnet database. In this case, it's ccnet. |
| seafile database name | Provide the name of the seafile database. In this case, it's seafile. |
| seahub database name | Provide the name of the seahub database. In this case, it's seahub. |
After successful installation, the terminal should display something like:
-----------------------------------------------------------------
Your seafile server configuration has been finished successfully.
-----------------------------------------------------------------

run seafile server:     ./seafile.sh { start | stop | restart }
run seahub  server:     ./seahub.sh  { start <port> | stop | restart <port> }

-----------------------------------------------------------------
If you are behind a firewall, remember to allow input/output of these tcp ports:
-----------------------------------------------------------------

port of seafile fileserver:   8082
port of seahub:               8000

When problems occur, refer to https://download.seafile.com/published/seafile-manual/home.md for information.
Configuration
You’ve successfully installed Seafile! Now, configure language preferences, permissions, administrator accounts, and auto-start at boot.
Step-by-step guide
Seafile user
Log into the server and create a system user which will run Seafile. For the purpose of this tutorial, we'll call this system user seafileadmin. Of course, you can choose any name, just make sure to adjust the commands accordingly:
sudo adduser --disabled-login seafileadmin
If not already the case, switch to the /var/www/seafile directory and create a script to activate the virtual environment when running Seafile:
cd /var/www/seafile
sudo vi run_with_venv.sh
Add the following content to the file:
#!/bin/bash
# Activate the python virtual environment (venv) before starting one of the seafile scripts

dir_name="$(dirname $0)"
source "${dir_name}/python-venv/bin/activate"
script="$1"
shift 1

echo "${dir_name}/seafile-server-latest/${script}" "$@"
"${dir_name}/seafile-server-latest/${script}" "$@"
Save and close the file (:wq!), then set the right permissions for the seafileadmin user:
sudo chown -R seafileadmin:seafileadmin /var/www/seafile
sudo chmod -R 755 /var/www/seafile
sudo chmod 750 /home/seafileadmin
Start Seafile:
sudo -H -u seafileadmin bash -C run_with_venv.sh seafile.sh start
Start Seahub:
sudo -H -u seafileadmin bash -C run_with_venv.sh seahub.sh start
The first time Seahub starts, it will ask to set up an administrator account. For the purpose of this tutorial, we'll provide the administrator email seafileadmin@gofoss.net. Of course, any other suitable email address will do. Just make sure to adapt the relevant commands accordingly. When prompted, provide a strong, unique password.
Deactivate the virtual environment and change back to the root directory:
deactivate
cd
Auto start
Let's make sure Seafile automatically starts every time the server boots. Create a first configuration file:
sudo vi /etc/systemd/system/seafile.service
Add the following content:
[Unit]
Description=Seafile
After= mysql.service network.target

[Service]
Type=forking
ExecStart= /var/www/seafile/run_with_venv.sh seafile.sh start
ExecStop= /var/www/seafile/run_with_venv.sh seafile.sh stop
User=seafileadmin

[Install]
WantedBy=multi-user.target
Save and close the file (:wq!), then create a second configuration file:
sudo vi /etc/systemd/system/seahub.service
Add the following content:
[Unit]
Description=Seahub
After= mysql.service network.target seafile.service

[Service]
Type=forking
Environment="LC_ALL=en_US.UTF-8"
ExecStart= /var/www/seafile/run_with_venv.sh seahub.sh start
ExecStop= /var/www/seafile/run_with_venv.sh seahub.sh stop
User=seafileadmin

[Install]
WantedBy=multi-user.target
Save and close the file (:wq!).
Autostart Seafile at each boot:
sudo systemctl daemon-reload
sudo systemctl enable seafile
sudo systemctl enable seahub
Reboot the server:
sudo reboot
Make sure Seafile is up and running (the status should be Active):
sudo systemctl status seafile
sudo systemctl status seahub
Wrap up
The cloud storage will be accessible from a domain of your choice. For the purpose of this tutorial, we'll choose https://myfiles.gofoss.duckdns.org. Of course, any other suitable address will do. Just make sure to adapt the relevant commands accordingly. Open the first configuration file:
sudo vi /var/www/seafile/conf/seahub_settings.py
Make sure the SERVICE_URL is pointing to the right address:
SERVICE_URL = "https://myfiles.gofoss.duckdns.org/"
Then, add the following lines at the end of the file (adapt the time zone and URL according to your own setup):
TIME_ZONE = 'Europe/Budapest'
SESSION_EXPIRE_AT_BROWSER_CLOSE = True
LOGIN_ATTEMPT_LIMIT = 2
FILE_SERVER_ROOT = 'https://myfiles.gofoss.duckdns.org/seafhttp'
CSRF_TRUSTED_ORIGINS = ['https://myfiles.gofoss.duckdns.org']
Save and close the file (:wq!).
To prevent ModEvasive from blocking your devices during file synchronisation, first identify their IP addresses. Open a terminal and run ip a (Linux), ifconfig (macOS), or ipconfig (Windows). You will typically see an address like 192.168.1.XX when connected via the local network, or 10.8.0.YY when connected through the VPN. Then, open the configuration file:
sudo vi /etc/apache2/mods-enabled/evasive.conf
Modify or add the following line to make sure your devices aren't blocked when synchronising with the Seafile server:
DOSWhitelist 192.168.1.XX 10.8.0.YY
Save and close the file (:wq!).
Web interface
Set up an Apache Virtual Host as a Reverse Proxy to access the Seafile web interface via a custom address and shield the server from direct internet exposure. Read on below for more details.
Step-by-step guide
Create an Apache configuration file:
sudo vi /etc/apache2/sites-available/myfiles.gofoss.duckdns.org.conf
Add the following content and make sure to adjust the settings to your own setup, such as domain names (myfiles.gofoss.duckdns.org), path to SSL keys, IP addresses and so on:
<VirtualHost *:80>

    ServerName              myfiles.gofoss.duckdns.org
    ServerAlias             www.myfiles.gofoss.duckdns.org
    Redirect permanent /    https://myfiles.gofoss.duckdns.org/

</VirtualHost>

<VirtualHost *:443>

    ServerName              myfiles.gofoss.duckdns.org
    ServerAlias             www.myfiles.gofoss.duckdns.org
    ServerSignature         Off

    <IfModule security2_module>
        SecRuleEngine Off
    </IfModule>

    SSLEngine               On
    SSLProxyEngine          On
    SSLProxyCheckPeerCN     Off
    SSLCertificateFile      /etc/dehydrated/certs/gofoss.duckdns.org/fullchain.pem
    SSLCertificateKeyFile   /etc/dehydrated/certs/gofoss.duckdns.org/privkey.pem
    DocumentRoot            /var/www/seafile

    <Location />
        Order deny,allow
        Deny from all
        Allow from 127.0.0.1
        Allow from 192.168.1.0/24
        Allow from 10.8.0.1/24
    </Location>

    Alias /media  /var/www/seafile/seafile-server-latest/seahub/media

    RewriteEngine On

    <Location /media>
    Require all granted
    </Location>

    # seafile fileserver
    ProxyPass /seafhttp http://127.0.0.1:8082
    ProxyPassReverse /seafhttp http://127.0.0.1:8082

    # seahub
    SetEnvIf Authorization "(.*)" HTTP_AUTHORIZATION=$1
    ProxyPreserveHost On
    ProxyPass / http://127.0.0.1:8000/
    ProxyPassReverse / http://127.0.0.1:8000/

    ErrorLog ${APACHE_LOG_DIR}/myfiles.gofoss.duckdns.org-error.log
    CustomLog ${APACHE_LOG_DIR}/myfiles.gofoss.duckdns.org-access.log combined

</VirtualHost>
Once the content is added, save and close the file (:wq!).
Note how we enable SSL encryption for Seafile with the instruction SSLEngine On, and use the SSL certicate /etc/dehydrated/certs/gofoss.duckdns.org/fullchain.pem as well as the private SSL key /etc/dehydrated/certs/gofoss.duckdns.org/privkey.pem, which were created earlier on.
Also note how we disabled ModSecurity in the Apache configuration file with the instruction SecRuleEngine Off, as Seafile and ModSecurity don't play well together.
Next, enable the Apache Virtual Host and reload Apache:
sudo a2ensite myfiles.gofoss.duckdns.org.conf
sudo systemctl reload apache2
Configure Pi-Hole to resolve Seafile's local address. Browse to https://mypihole.gofoss.duckdns.org:8443/admin and log into Pi-Hole's web interface (adjust accordingly). Navigate to the menu entry Local DNS Records and add the following domain/IP combination (adjust accordingly):
DOMAIN:      myfiles.gofoss.duckdns.org
IP ADDRESS:  192.168.1.100
Browse to https://myfiles.gofoss.duckdns.org and log in as seafileadmin@gofoss.net (adjust accordingly). Then apply the following settings:
| Setting | Description |
|---|---|
| System Admin ‣ Settings | Change the field SERVICE_URL to https://myfiles.gofoss.duckdns.org and click on Save. |
| System Admin ‣ Settings | Change the field FILE_SERVER_ROOT to https://myfiles.gofoss.duckdns.org/seafhttp and click on Save. |
Clients
Seahub
Seahub is Seafile's web interface. You can log in through a browser to navigate folders, upload, edit, and download files, and share data. Seahub natively supports Microsoft and LibreOffice file formats, along with videos, pictures, PDFs, and text files. Changes made in Seahub reflect across all synced devices.
Syncing client
This app ensures selected files and folders stay in sync across connected devices. Ideal for devices with ample storage capacity.
Step-by-step guide
| Instructions | Description |
|---|---|
| Installation | Download & install the latest release of Seafile's Desktop Sync Client for Windows.  |
| Storage | Launch the Seafile client and select a local folder to be synched with the cloud. 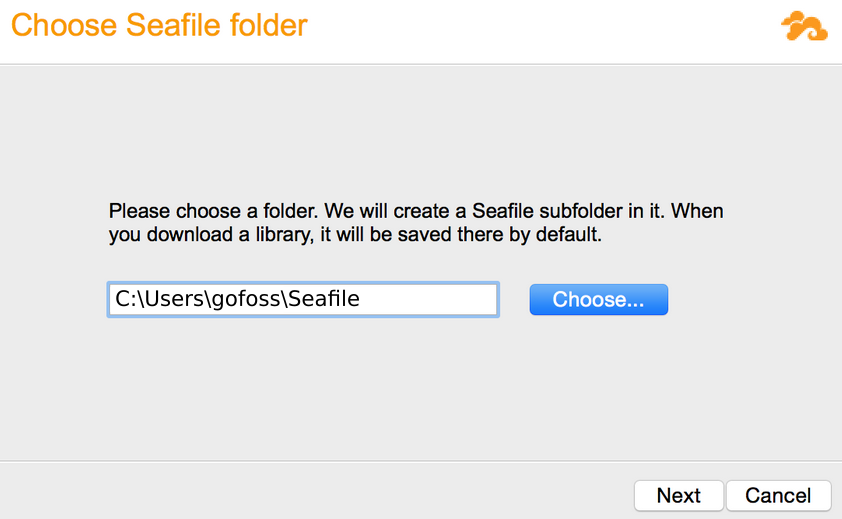 |
| Credentials | Provide the server name as well as user credentials. If enabled, also provide two-factor authentication. 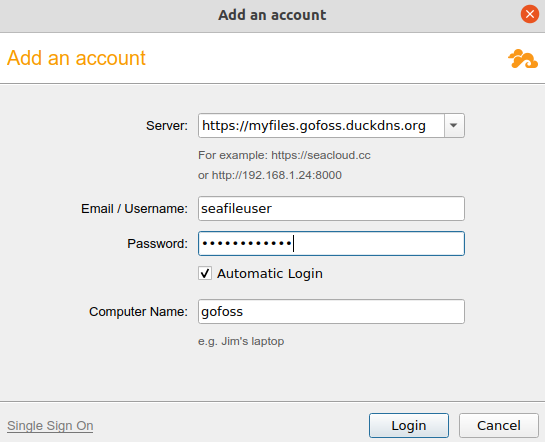 |
Step-by-step guide
| Instructions | Description |
|---|---|
| Installation | Download & install the latest release of Seafile's Desktop Sync Client for macOS. |
| Storage | Launch the Seafile client and select a local folder to be synched with the cloud. 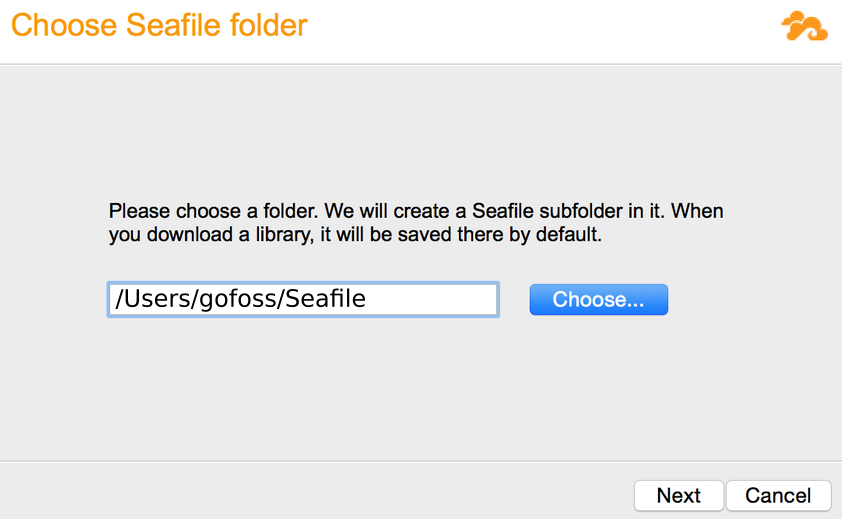 |
| Credentials | Provide the server name as well as user credentials. If enabled, also provide two-factor authentication. |
Step-by-step guide
| Instructions | Description |
|---|---|
| Download | Download the latest release of Seafile's Desktop Sync Client for Linux. The filename should be similar to Seafile-x86_64-x.y.z.AppImage. |
| Run AppImage | Make the file executable: sudo chmod +x Seafile-x86_64-x.y.z.AppImage. Then, launch The Syncing client: ./Seafile-x86_64-x.y.z.AppImage. |
| Storage | Select a local folder to be synched with the cloud.  |
| Credentials | Provide the server name as well as user credentials. If enabled, also provide two-factor authentication. |
SeaDrive
SeaDrive functions as a network drive, enabling file access without prior synchronization. Files can also be cached for offline use. SeaDrive is ideal for expanding storage on devices with limited disk space.
Step-by-step guide
| Instructions | Description |
|---|---|
| Installation | Download & install the latest release of the SeaDrive Client for Windows.  |
| Virtual Drive | Launch the SeaDrive client and select a drive letter for the virtual drive. By default, S: will be used. |
| Credentials | Provide the server name as well as user credentials. If enabled, also provide two-factor authentication. |
| File List | SeaDrive will fetch a list of all files and folders stored on the server, without actually downloading data. A notification will show once it's done. Cloud files can now be accessed via the Windows Explorer, just like any ordinary hard drive. 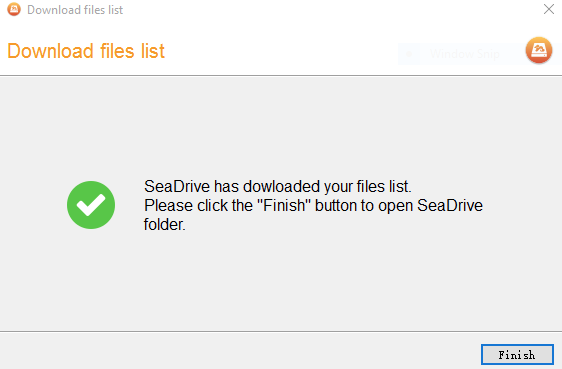 |
Step-by-step guide
| Instructions | Description |
|---|---|
| Installation | Download & install the latest release of the SeaDrive Client for macOS. |
| Virtual Drive | Launch the SeaDrive client and select a drive letter for the virtual drive. By default, S: will be used. |
| Credentials | Provide the server name as well as user credentials. If enabled, also provide two-factor authentication. |
| File List | SeaDrive will fetch a list of all files and folders stored on the server, without actually downloading data. A notification will show once it's done. Cloud files can now be accessed, just like any ordinary hard drive. |
Step-by-step guide
| Instructions | Description |
|---|---|
| Download | Download the latest release of Seafile's Desktop Drive Client for Linux. The filename should be similar to SeaDrive-x86_64-x.y.z.AppImage. |
| Run AppImage | Make the file executable: sudo chmod +x SeaDrive-x86_64-x.y.z.AppImage. Then, launch The SeaDrive client: ./SeaDrive-x86_64-x.y.z.AppImage. |
| Credentials | Provide the server name as well as user credentials. If enabled, also provide two-factor authentication. After logging in, the virtual drive will be mounted in ~/SeaDrive. |
| File List | SeaDrive will fetch a list of all files and folders stored on the server, without actually downloading data. A notification will show once it's done. Cloud files can now be accessed, just like any ordinary hard drive. |
Mobile clients
Access and manage your files on smartphones and tablets with Seafile’s mobile app. Files are cached without complete synchronization to save storage. There is also a convenient feature for automatic photo backup to your server.
Step-by-step guide
Open F-Droid on your phone and install the Seafile application. Alternatively, install Seafile via the Aurora Store or Google's Play Store.
| Setting | Description |
|---|---|
| Server | Provide the address of the Seafile server, e.g. https://myfiles.gofoss.duckdns.org (adjust accordingly). |
Provide the email address of the Seafile user, e.g. seafileuser@gofoss.net (adjust accordingly). | |
| Password | Provide the password of the Seafile user. |
| Token | If two-factor authentication is enabled, enter the token generated by andOTP on your phone. |
Step-by-step guide
Install Seafile's file sharing app via the App Store.
| Setting | Description |
|---|---|
| Server | Provide the address of the Seafile server, e.g. https://myfiles.gofoss.duckdns.org (adjust accordingly). |
Provide the email address of the Seafile user, e.g. seafileuser@gofoss.net (adjust accordingly). | |
| Password | Provide the password of the Seafile user. |
| Token | If two-factor authentication is enabled, enter the token generated by andOTP on your phone. |
Users
Seafile distinguishes between two user types. Administrators get full access to add, edit, and remove files, folders, and users. They also maintain and update the website. In our example, the administrator seafileadmin was established during the Seafile server installation. Users, on the other hand, have restricted access. They can manage files and folders solely when granted specific permissions.
Step-by-step guide
| Instructions | Description |
|---|---|
| Step 1 | Browse to https://myfiles.gofoss.duckdns.org and log in as administrator, e.g.seafileadmin@gofoss.net (adjust accordingly). |
| Step 2 | Navigate to System Admin ‣ Users ‣ Add user. |
| Step 3 | Provide a user name, as well as a strong, unique password. Then click on Submit. |
Admins & users need a VPN access
All users must be connected to the server via VPN to access Seafile.
Two-factor authentication
Enhance security with the optional Two-factor authentication (2FA) feature. When activated, logging into Seafile demands both a password and a 6-digit code generated by a phone app. We suggest using andOTP, available from F-Droid.
Step-by-step guide
First, Seafile's administrator needs to enable 2FA:
| Instructions | Description |
|---|---|
| Step 1 | Log into Seafile's web interface https://myfiles.gofoss.duckdns.org as seafileadmin@gofoss.net (adjust accordingly). |
| Step 2 | Navigate to System Admin ‣ Settings ‣ Passwords. |
| Step 3 | Enable two factor authentication for all users. |
Next, each user needs to configure 2FA. Start with the Seafile administrator, and repeat for each user account set up subsequently:
| Instructions | Description |
|---|---|
| Step 1 | Log into Seafile's web interface https://myfiles.gofoss.duckdns.org. |
| Step 2 | Navigate to Settings. |
| Step 3 | Enable two factor authentication. |
| Step 4 | Open andOTP on the user's phone. |
| Step 5 | Scan the displayed QR code with andOTP. |
| Step 6 | Enter the 6 digit code generated by andOTP into Seafile's web interface. |
| Step 7 | Store the list of backup tokens provided by Seafile. They allow to recover access to Seafile without andOTP. |
Add files
Effortlessly create new libraries, files, and folders using Seahub through the browser. Uploading files and folders to existing libraries is also a breeze.
Effortlessly create new libraries, files, and folders using Seafile's Syncing client. Uploading files and folders to existing libraries is also a breeze.
Step-by-step guide
| Instructions | Description |
|---|---|
| Create a new library | Open the Syncing client, click on Select and browse to the local folder you want to sync with the server. Alternatively, drag & drop the local folder to the designated area. Next, provide a name for the new library, and specify whether or not it should be encrypted with a password. 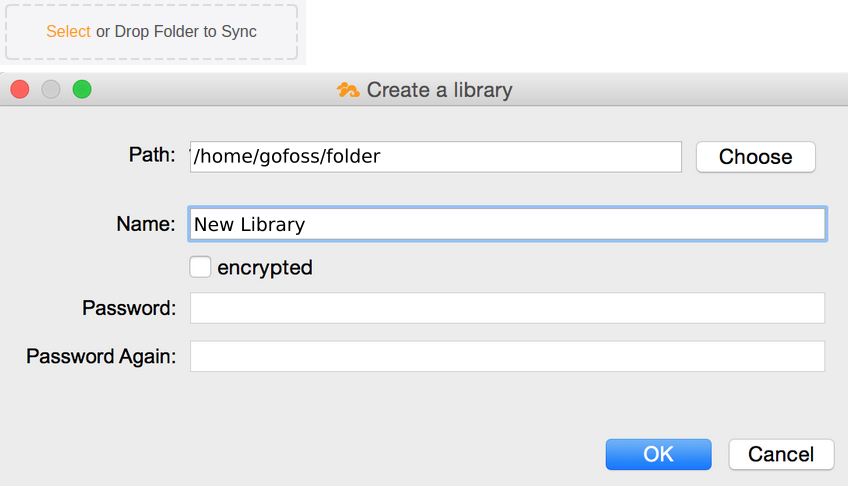 |
| Add files & folders to an existing library | Use the device's file manager. Navigate to the synchronised folder and add files & folders as required. Changes will be synchronised to the Seafile server, as well as any connected devices. |
Sync files
Seafile works with libraries, containing your files and folders. The Syncing client ensures that any local library changes mirror to your server and other connected devices, and vice versa.
Step-by-step guide
| Instructions | Description |
|---|---|
| Sync a library | Open the Syncing client and right click on the library. Then, select the menu entry Sync this library. All files and folders will be downloaded from the server to the local storage. From now on, any modification to local files will be mirrored to the server, and vice versa.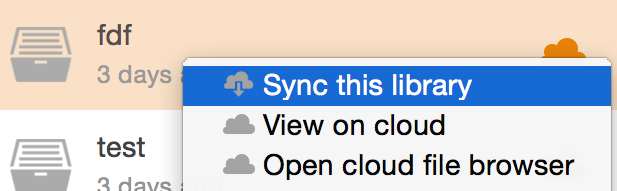 |
| Unsync a library | To stop syncing a library, right click and select the menu entry Unsync. Modification to local files will no longer be mirrored to the server, and vice versa. |
| Cloud File Browser | The Syncing client provides a so-called Cloud File Browser. It allows users to access and modify files directly on the server, without prior synchronisation. Right click on an (unsynced) library and select the menu entry Open Cloud File Browser. 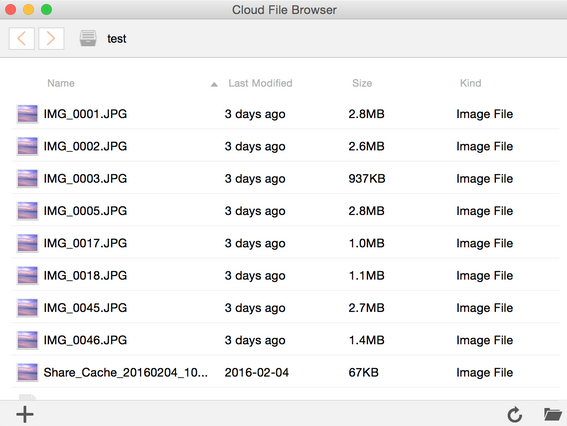 |
| Sync sub-folders | To avoid syncing large libraries, it's possible to sync specific sub-folders only. Right click on the library, select the menu entry Open Cloud File Browser, right click on the sub-folder and select the menu entry Sync this folder. 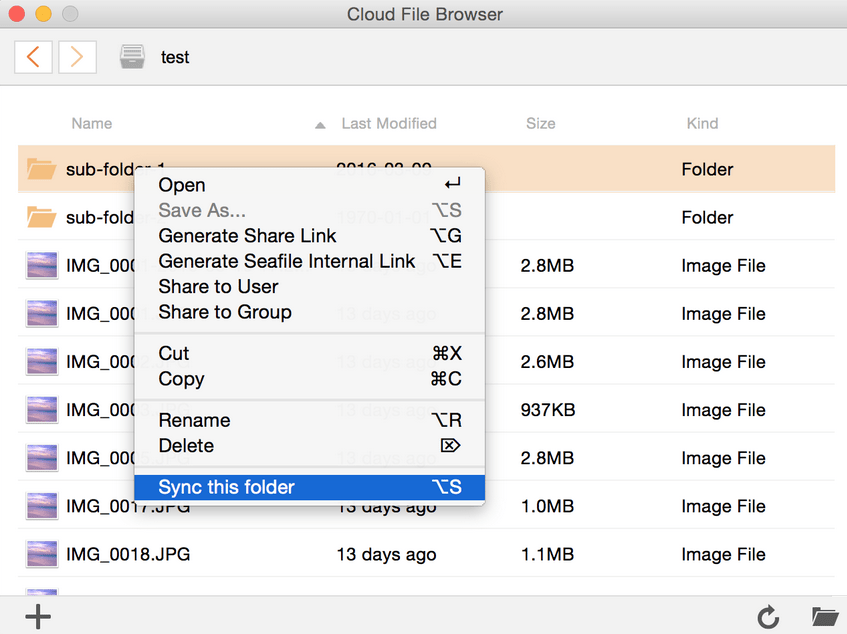 |
SeaDrive works like a network drive. You have direct access to files on your server without the need for prior synchronization.
Tell me more about the sync status
Windows Explorer displays various icons to indicate the sync status of files and folders.
| State | Icon | Description |
|---|---|---|
| Cloud-only |  | This is the default state of files and folders. They are displayed in SeaDrive, but aren't actually downloaded to the local storage. |
| Synched |  | Once a user decides to access a file or folder, it will be downloaded to the local storage. |
| Partially synched |  | Folders containing both cloud-only and synched files are considered as partially synched. |
| Locked by others |  | Files locked by other users can only be opened in read-only mode, but not modified, deleted or renamed. |
| Locked by me |  | A file or folder locked by its owner can't be modified by others. |
| Read-only |  | Files or folders shared in read-only mode with a user can be opened, but not modified, deleted or renamed. |
Share files
You can share files with anyone – all they need is a public share link and a working VPN connection. No Seafile account or login is needed. Secure your share links with a password, expiration time, or limited file permissions.
Step-by-step guide
| Instructions | Description |
|---|---|
| Step 1 | Navigate to the file or folder to be shared. |
| Step 2 | Hover over the file or folder and click on the Share icon. |
| Step 3 | Click on the Share Link tab in the pop-up window. |
| Step 4 | Click on the Generate button to create the share link. |
| Step 5 | Optionally, set a password, expiration time or permissions. |
| Step 6 | Share the link with others by email, messenger, and so on. |
Anyone can upload files effortlessly to your server with just a public link and a working VPN connection. No Seafile account or login is needed. Optionally, secure your upload links with a password.
Step-by-step guide
| Instructions | Description |
|---|---|
| Step 1 | Navigate to the folder to which files are to be uploaded. |
| Step 2 | Hover over the folder and click on the Share icon. |
| Step 3 | Click on the Upload Link tab in the pop-up window. |
| Step 4 | Click on the Generate button to create the upload link. |
| Step 5 | Optionally, set a password. |
| Step 6 | Share the link with others by email, messenger, and so on. |
Share libraries, files, and folders effortlessly with other Seafile users. This requires a working VPN connection, a Seafile account, and appropriate permissions.
Step-by-step guide
| Instructions | Description |
|---|---|
| Step 1 | Navigate to the library or folder you want to share with other Seafile users. |
| Step 2 | Hover over the library or folder and click on the Share icon. |
| Step 3 | Click on the Share to user or Share to group tab in the pop-up window. |
| Step 4 | Select users or groups and click on the Submit button. |
| Step 5 | Set permission on the shared files & folders, such as read-write, read-only, online read-write or online read-only. |
Restore files
Seafile tracks file, folder, and library modifications. It maintains a backup of old file versions and snapshots of folder and library structures for a set period. You can easily restore files, folders, or entire libraries to previous states in case of accidental deletion or errors.
Determine how long Seafile retains file versions or library snapshots with the retention period. You can configure this individually for each library.
Step-by-step guide
| Instructions | Description |
|---|---|
| Step 1 | Log into the Seahub web interface. Click on My Libraries in the navigation panel. |
| Step 2 | Hover the cursor over the library. |
| Step 3 | Click on History Setting. |
| Step 4 | Define the length of the retention period. |
Restore previous file versions by following the instructions below.
Step-by-step guide
| Instructions | Description |
|---|---|
| Step 1 | Log into the Seahub web interface. Navigate to the folder containing the file. |
| Step 2 | Hover the cursor over the file. |
| Step 3 | Click on History. |
| Step 4 | Download, restore, or view any older version of the file. For text files, the content of two versions can be compared. Note that older versions of a file cannot be viewed if they exceed the retention period. |
Restore deleted files or folders from the trash bin by following the instructions below.
Step-by-step guide
| Instructions | Description |
|---|---|
| Step 1 | Log into the Seahub web interface. Navigate to the parent folder containing the deleted file or folder. |
| Step 2 | Click on the trash icon in the library operation bar. |
| Step 3 | Restore the deleted file or folder from the list. Note that files and folders cannot be restored if they have been deleted before the retention period. |
Explore and restore previous versions of entire libraries with snapshots. File and folder structures are preserved.
Step-by-step guide
| Instructions | Description |
|---|---|
| Step 1 | Log into the Seahub web interface. Navigate to the library. |
| Step 2 | Click on the History button in the top bar. |
| Step 3 | Select a previous state of the library and click on View snapshot. |
| Step 4 | Download, restore, or view any older version of a file or folder. If you're the library's owner, you can restore the entire library to its previous state. Note that library snapshots cannot be accessed if they exceed the retention period. |
Encrypt files
Seafile ensures client-side end-to-end encryption. Protect libraries with a password to restrict access to authorized users. The content of encrypted libraries remains inaccessible to anyone else, including the Seafile administrator. It's important to note that encrypted libraries secure file contents but not folder and file names.
Upgrade
Upgrade Seafile cautiously as the process is primarily manual, prone to errors. Minimize risks by syncing all your libraries to a device and backing up your data! Read Seafile's upgrade instructions and detailed notes carefully. Here's a step-by-step guide for a major version upgrade.
Walk me through the upgrade process
For the purpose of this tutorial, let's assume you want to upgrade from version 7.0.1 to version 8.0.1. This is called a "major version upgrade". Note that "minor version upgrades", for example from 7.0.1 to 7.1.1, work similarly.
Start by reading the upgrade notes, which contain specific settings or changes that must be applied before or during the upgrade.
Download and extract the latest release of Seafile's Server for Linux. In this example, it would be version 8.0.1. Make sure to adjust the version number accordingly:
sudo wget -4 https://download.seadrive.org/seafile-server_8.0.1_x86-64.tar.gz
sudo tar -xvf seafile-server_*
sudo mv seafile-server-* /var/www/seafile
sudo mv seafile-server_* /var/www/seafile/installed
Set the right permissions:
sudo chown -R seafileadmin:seafileadmin /var/www/seafile
sudo chmod -R 755 /var/www/seafile
Verify everything is in place:
sudo ls -al /var/www/seafile
The directory layout should look something like:
/var/www/seafile/
-- ccnet
-- conf
-- installed
-- logs
-- pids
-- seafile-data
-- seafile-server-7.0.1
-- seafile-server-8.0.1
-- seafile-server-latest
-- seahub-data
Shutdown the Seafile server:
sudo systemctl stop seafile
sudo systemctl stop seahub
Get a list of available upgrade scripts:
sudo ls -al /var/www/seafile/seafile-server-8.0.1/upgrade/upgrade_*
The terminal should print something like:
...
/var/www/seafile/seafile-server-8.0.1/upgrade/upgrade_6.0_6.1.sh
/var/www/seafile/seafile-server-8.0.1/upgrade/upgrade_6.1_6.2.sh
/var/www/seafile/seafile-server-8.0.1/upgrade/upgrade_6.2_6.3.sh
/var/www/seafile/seafile-server-8.0.1/upgrade/upgrade_6.3_7.0.sh
/var/www/seafile/seafile-server-8.0.1/upgrade/upgrade_7.0_7.1.sh
/var/www/seafile/seafile-server-8.0.1/upgrade/upgrade_7.1_8.0.sh
...
Now, run the required upgrade script(s), starting from your current Seafile version and working your way up to the latest version. In this example:
- we first have to run the script
upgrade_7.0_7.1.shto upgrade from version 7.0.1 to version 7.1.x - we then have to run the script
upgrade_7.1_8.0.shto upgrade from version 7.1.x to version 8.0.1
Start with the first upgrade script:
sudo bash /var/www/seafile/seafile-server-8.0.1/upgrade/upgrade_7.0_7.1.sh
The terminal should prompt something similar to:
-------------------------------------------------------------
This script would upgrade your seafile server from 7.0 to 7.1
Press [ENTER] to continue
-------------------------------------------------------------

Updating seafile/seahub database ...

[INFO] You are using MySQL
[INFO] updating seahub database...
Done

migrating avatars ...

Done

updating /var/www/seafile/seafile-server-latest symbolic link to /var/www/seafile/seafile-server-7.1.0 ...
Now the next upgrade script:
sudo bash /var/www/seafile/seafile-server-8.0.1/upgrade/upgrade_7.1_8.0.sh
The terminal should prompt something similar to:
-------------------------------------------------------------
This script would upgrade your seafile server from 7.1 to 8.0
Press [ENTER] to continue
-------------------------------------------------------------

Updating seafile/seahub database ...

[INFO] You are using MySQL
[INFO] updating seahub database...
Done

migrating avatars ...

Done

updating /var/www/seafile/seafile-server-latest symbolic link to /var/www/seafile/seafile-server-8.0.1 ...
Finally, start up the Seafile server again:
sudo systemctl start seafile
sudo systemctl start seahub
If all went well, Seafile should be running, and its status should show "Active":
sudo systemctl status seafile
sudo systemctl status seahub
Optionally, if the new version works fine, you can remove the previous version:
sudo rm -rf /var/www/seafile/seafile-server-7.0.1
Support
For further details, refer to Seafile's server manual or request support from the community.