A Beginner's Guide To Ubuntu
Last updated: May 2022. For beginners and intermediate users. Some tech skills required.
What is Ubuntu LTS?
Ubuntu is an african word meaning humanity or humanity towards others. It also qualifies a philosophy which encourages community equality, the distribution of wealth and the appreciation of individual uniqueness.
In this spirit, the UK-based company Canonical Ltd develops and releases the eponymous Ubuntu operating system, an open source Debian-based Linux distribution. Ubuntu is released every six months, with long-term support (LTS) releases every two years. At the time of writing, the latest LTS release is Ubuntu 22.04, which is supported until April 2027.
Ubuntu comes in many official and inofficial flavours, each packaging different desktop environments with their own distinctive look and feel: Ubuntu GNOME (default), Ubuntu Mate, Xubuntu, Lubuntu, Kubuntu, elementaryOS, Linux Mint, Pop!_OS, Zorin OS and so on. In this chapter, we'll review the official Ubuntu flavor, featuring the GNOME desktop environment.
Ubuntu Live USB & VirtualBox
The easiest way to discover Ubuntu GNOME is to run it alongside your current operating system, for example using a Live USB drive or VirtualBox. If Ubuntu isn't to your liking, you can simply switch back to Windows or macOS.
To give Ubuntu a quick spin, run it off a Live DVD or USB drive. More details below.
Show me a step-by-step guide
| Instructions | Description |
|---|---|
| Download | Download the latest long-term support (LTS) version of Ubuntu. At the time of writing, the latest LTS was Ubuntu 22.04. Check out the most recent Ubuntu release cycle for more information. |
| Burn | Use a Windows, macOS or Ubuntu Linux machine to burn the downloaded .iso file to a DVD. Alternatively, use a Windows, macOS or Ubuntu machine to create a bootable USB drive. |
| Restart | Insert the bootable DVD or USB drive into the computer on which you want to test Ubuntu, then restart the machine. Most machines will boot automatically from the DVD or USB drive. If that's not the case, try repeatedly hitting F12, ESC, F2 or F10 when the computer starts up. This should provide access to the boot menu, where you can select the DVD or USB drive as boot device. |
| Test Ubuntu | Once booted from the DVD or USB drive, select Try or Install Ubuntu and press ENTER. Wait until Ubuntu loads from the bootable device, this can take a while. Once the welcome screen appears, select Try Ubuntu from the menu. |
VirtualBox is another option to discover Ubuntu while keeping your current operating system. The program creates so-called virtual machines which run inside your Windows or macOS machine. More detailed instructions below.
Show me a step-by-step guide
Install VirtualBox
Make sure your computer meets the minimum requirements: 2GHz dual core processor or better, 2 GB RAM or more, 25 GB of free drive space. Download and run the latest VirtualBox Platform Package for Windows hosts. Open the downloaded .exe file and follow the installation wizard.
Make sure your computer meets the minimum requirements: 2GHz dual core processor or better, 2 GB RAM or more, 25 GB of free drive space. Download the VirtualBox Platform Package for OS X hosts. To install VirtualBox on Mac, open the downloaded .dmg file and drag the VirtualBox icon on top of the Application folder. For easy access, open the Applications folder and drag the VirtualBox icon to your dock.
Configure VirtualBox
| Instructions | Description |
|---|---|
| Download Ubuntu | Download the latest long-term support (LTS) version of Ubuntu Desktop. At the time of writing, the latest Ubuntu LTS was Ubuntu 22.04. Check out the Ubuntu release schedule for more information about the most recent Ubuntu LTS releases. |
| Create a Virtual Machine | Start VirtualBox and click on the button New. |
| Name and operating system | Give your Virtual Machine (VM) a name, for example Ubuntu. Also select the Operating System (Linux) and the version, for example Ubuntu (64-bit). |
| Memory size | Choose how much RAM to allocate to Ubuntu. 2 GB are recommended, 3-4 GB are even better. |
| Hard disk | Select Create a virtual hard disk now to add a virtual hard disk. |
| Hard disk file type | Choose the VDI format for the hard disk file type. |
| Storage on physical hard disk | Choose Dynamically allocated for the hard disk file size. |
| File location and size | Choose where to create the virtual disk. Also, decide how much disk space to allocate to Ubuntu. 10 GB are recommended, more is even better. |
| Optical Disk Selector | Back on the main screen, click on Start to launch the Virtual Ubuntu Machine. In the pop-up dialogue, click on the icon to choose a virtual optical disk file. Click on Add and navigate to the location of the previously downloaded LTS Ubuntu .iso file. Click on Open, Choose and Start. |
| Boot | From the boot menu, select Try or Install Ubuntu and press ENTER. After the boot phase, the Ubuntu installation wizard will show up. |
Install VirtualBox Ubuntu
| Instructions | Description |
|---|---|
| Welcome | Select a language and click on Install Ubuntu. |
| Keyboard layout | Select a keyboard layout. |
| Updates and other software | Choose between a normal or minimal installation, depending on how many apps you would like to install from the start.Optionally, check the box Download updates while installing Ubuntu to speed up the setup after the installation, and the box Install third-party software to benefit from (proprietary) drivers for graphics, WiFi, media files, and so on. Click on Continue. |
| Installation type & encryption | This screen allows to choose whether to delete the existing operating system and replace it with Ubuntu, or whether to install Ubuntu alongside the existing operating system (so-called dual boot). Since we're installing Ubuntu in VirtualBox, no other operating system is present. Just choose Erase disk and install Ubuntu, click on Advanced features and select Use LVM with the new Ubuntu installation as well as Encrypt the new Ubuntu installation for security. Then click on OK and Install Now. |
| Choose a security key | Choose a strong and unique security key. It will be required to decrypt the disk each time the computer starts up. Also check the box Overwrite empty disk space for more security. Click on Install Now. Confirm the pop-up window by clicking on Continue. Caution: If you lose the security key, all data will be lost. Store the security key safely. |
| Where are you? | Choose a time zone and location. Click on Continue. |
| Who are you? | Provide login information, such as a username and strong, unique password. Select Require my password to log in. Click on Continue. |
| Restart & login for the first time | Click on Restart Now after the successful installation. The Virtual Machine will reboot. You can now log in to your first Ubuntu session by providing the correct security key and password. |
| Discover Ubuntu | Walk through the initial setup options, and start discovering Ubuntu. Close the session once you've finished. Going forward, you can launch Ubuntu by clicking on the Start button on VirtualBox's main screen. |
Show me the 5-minute summary video

How to install Ubuntu
Start to like Ubuntu? Want to permanently install it on your computer? Great! Just perform some preliminary checks and follow the installation instructions below.
Show me the list of preliminary checks
| Checklist | Description |
|---|---|
| Is my device compatible with Linux? | • Test it with a Live USB or VirtualBox • Check the compatibility database • Ask the Internet • Buy a Linux compatible computer, e.g. at Linux Preloaded or the Ministry of Freedom |
| Does my device fulfill the minimum requirements? | • 2 GHz dual core processor • 4 GB system memory (RAM) • 25 GB of free storage space (Ubuntu takes approx. 5 GB, keep at least 20 GB for your data) |
| Is my device plugged in? | If you install Ubuntu on a mobile device such as a laptop, make sure it's plugged in. |
| Is the installation medium accessible? | Check if your computer has either a DVD drive or a free USB port. |
| Is my device connected to the Internet? | Check if the Internet connection is up and running. |
| Have I backed up my data? | Back up your data, since there is a (small but real) risk of data loss during the installation process! |
| Have I downloaded the latest Ubuntu version? | Download the latest long-term support (LTS) version of Ubuntu, which is supported for 5 years, including security and maintenance updates. At the time of writing, the latest LTS was Ubuntu 22.04. Check out the most recent release cycle for more information. |
| Have I prepared a Ubuntu bootable USB or DVD? | Use a Windows, macOS or Ubuntu Linux machine to burn the downloaded .iso file to a DVD. Alternatively, use a Windows, macOS or Ubuntu machine to create a bootable USB drive. |
Show me the step-by-step guide
| Instruction | Description |
|---|---|
| Boot | Insert the bootable DVD or USB drive and restart the computer. Most machines will boot automatically from the DVD or USB drive. If that's not the case, try repeatedly hitting F12, ESC, F2 or F10 when the computer starts up. This should provide access to the boot menu, where you can select the DVD or USB drive as boot device. Once booted from the DVD or USB drive, select Try or Install Ubuntu and press ENTER. Wait until Ubuntu loads from the bootable device, this can take a while. |
| Welcome | You will be presented with the installation wizard. Select a language and click on Install Ubuntu. |
| Keyboard layout | Select a keyboard layout. |
| Updates and other software | Choose between a normal or minimal installation, depending on how many apps you would like to install from the start. Optionally: • Check the box Download updates while installing Ubuntu to speed up the setup after the installation • Check the box Install third-party software to benefit from (proprietary) drivers for graphics, WiFi, media files, and so on.Next, click on Continue. |
| Installation type & encryption | Choose whether to: • Delete the existing operating system and replace it with Ubuntu. Caution: this will erase all data on your hard drive! Make sure you backed up your data! • Or install Ubuntu alongside the existing operating system (so-called dual boot). This should have no incidence on the existing configuration of your computer. Still, make sure backed up your data, you never know... To encrypt Ubuntu, click on Advanced features and select: • Use LVM with the new Ubuntu installation • Encrypt the new Ubuntu installation for security Then click on OK and Install Now. |
| Provide a security key | Enter a strong, unique security key. It will be required to decrypt the disk each time the computer starts up. Also check the box Overwrite empty disk space for more security. Click on Install Now. Confirm the pop-up window by clicking on Continue. Caution: If you lose this security key, all data will be lost. Store it safely. |
| Where are you? | Choose a time zone and location. Click on Continue. |
| Who are you? | Provide login information, such as a user name and a strong, unique password. Select Require my password to log in for more security. Then click on Continue. |
| Restart & login for the first time | That's it. Wait for the installation to finish, remove the USB key and click on Restart Now when prompted. After the reboot, log into Ubuntu with your security key and password. |
Show me the 2-minute summary video

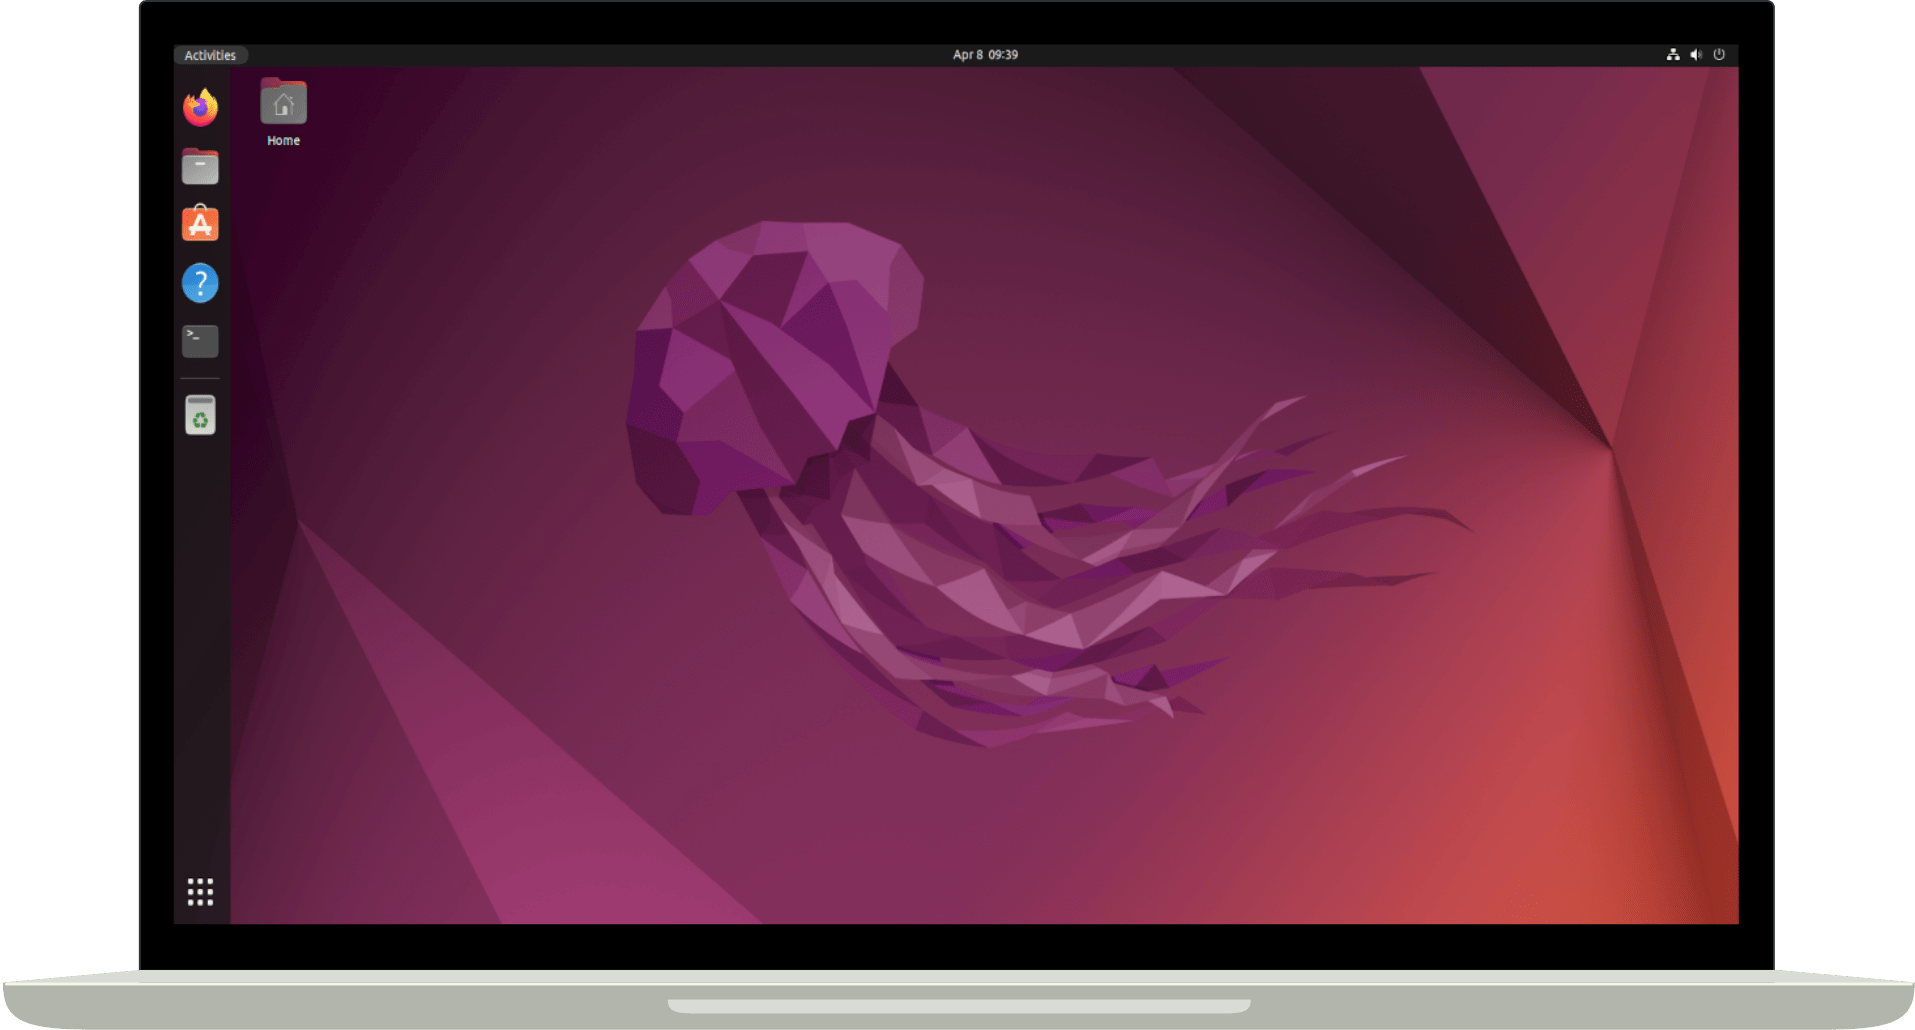
The GNOME Desktop
After signing in, the so-called GNOME Desktop will load. Below a quick overview of the various GNOME Desktop elements.
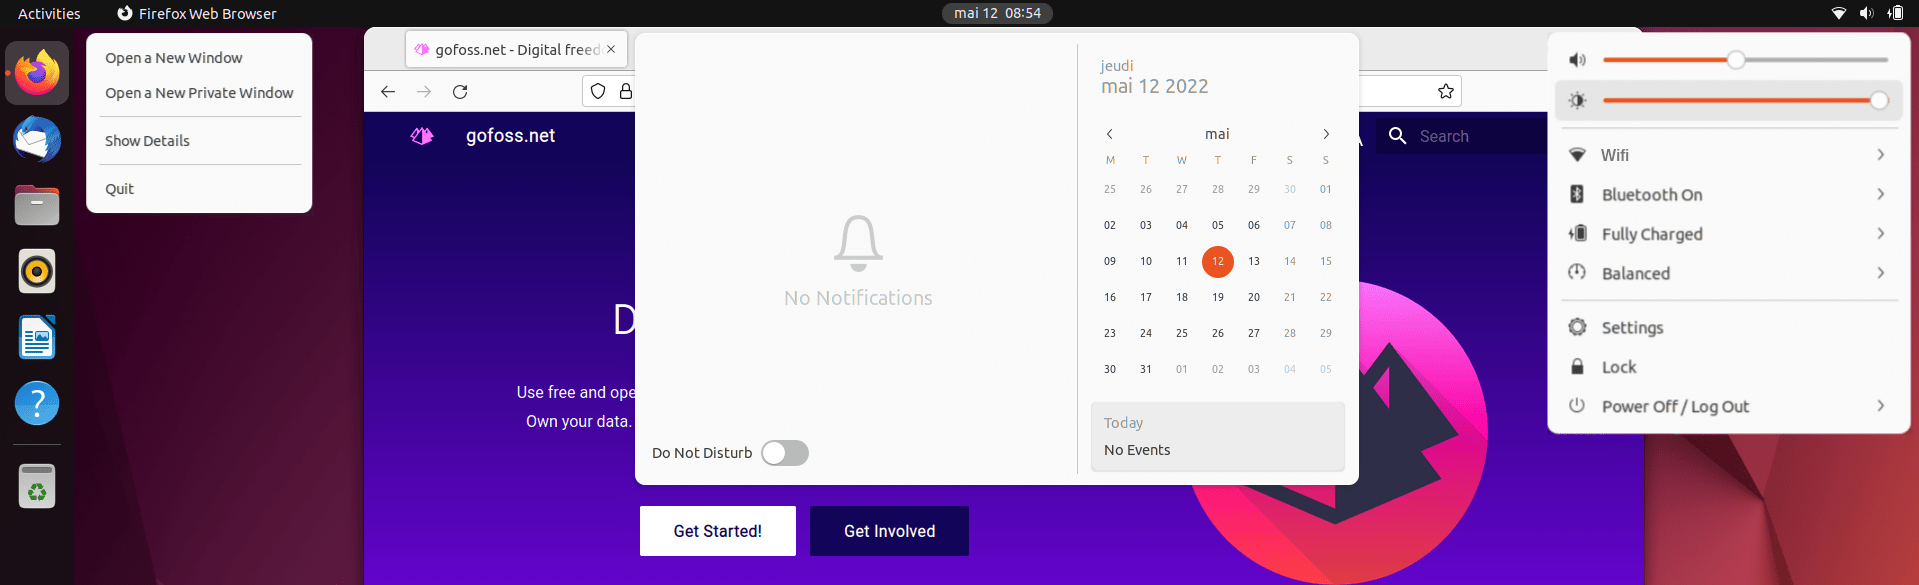
The top bar provides quick access to:
- Activities: click on the
Activitiesbutton on the top left of the screen to access open windows and workspaces, or search for apps, files and folders. Alternatively, perform a three-finger upward swipe on your touchpad to access the Activities overview - Clock, calendar & appointments: view the current time and date, a calendar and a list of your appointments
- System properties: manage system properties such as sound, screen brightness, network connections, power mode, microphone status during calls, session log out, etc.
Notice that you can add a battery percentage indicator via Settings ‣ Power ‣ Suspend & Power button.
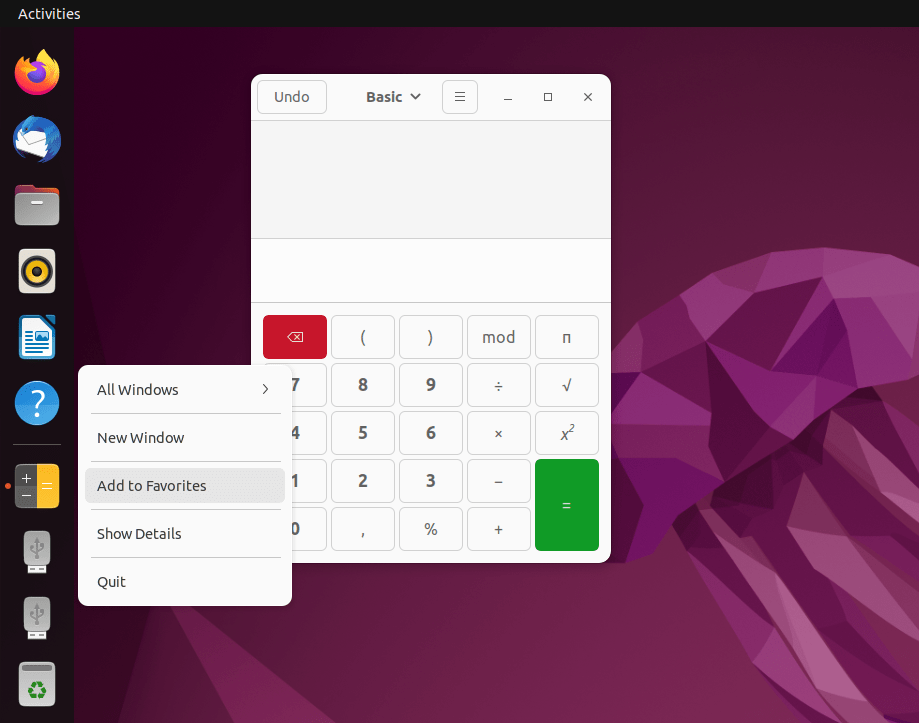
By default, the dock appears on the left side of the desktop. It displays:
- Pinned apps: quickly access your favourite apps. To pin an app to the dock, simply right-click on its icon in the App Launcher or in the dock (when it's running) and select
Add to Favorites. Notice that icons in the dock can be re-arranged to your liking - Running apps: access currently running apps. They are displayed in the lower half of the dock
- Mounted volumes & Trash: access your drives or the Trash bin
Fine-tune the dock's appearance under Settings ‣ Appearance ‣ Dock: reduce the dock size by disabling the Panel mode, move the dock to another location on the desktop, auto-hide the dock, modify the icon size or hide mounted volumes and the Trash icon.
To enable minimise-on-click, which allows you to click on an app icon in the dock to minimise or restore the corresponding window. Simply run the following command in the terminal:
gsettings set org.gnome.shell.extensions.dash-to-dock click-action 'minimize'
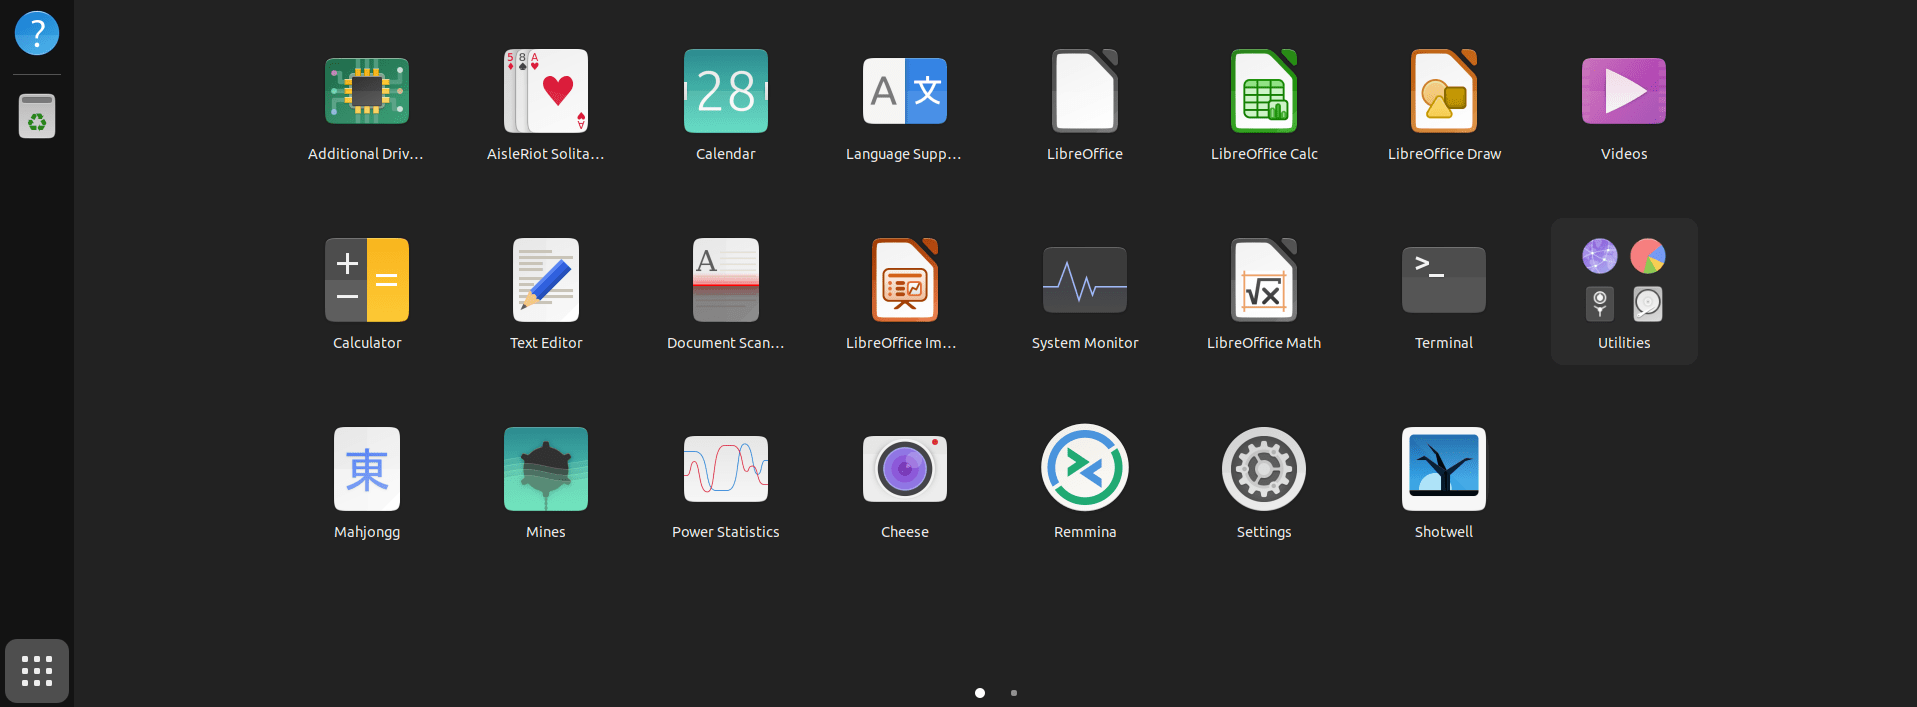
The App Launcher provides access to all installed apps:
- Open the App Launcher: click on the nine-dot-icon on the bottom left of the destkop, or perform two consecutive three-finger upward swipes on your touchpad
- Scroll through the App Launcher: scroll horizontally through your apps with the mouse, or a two-finger left/right swipe on your touchpad
- Rearrange icons: simply drag and drop app icons to rearrange them to your liking
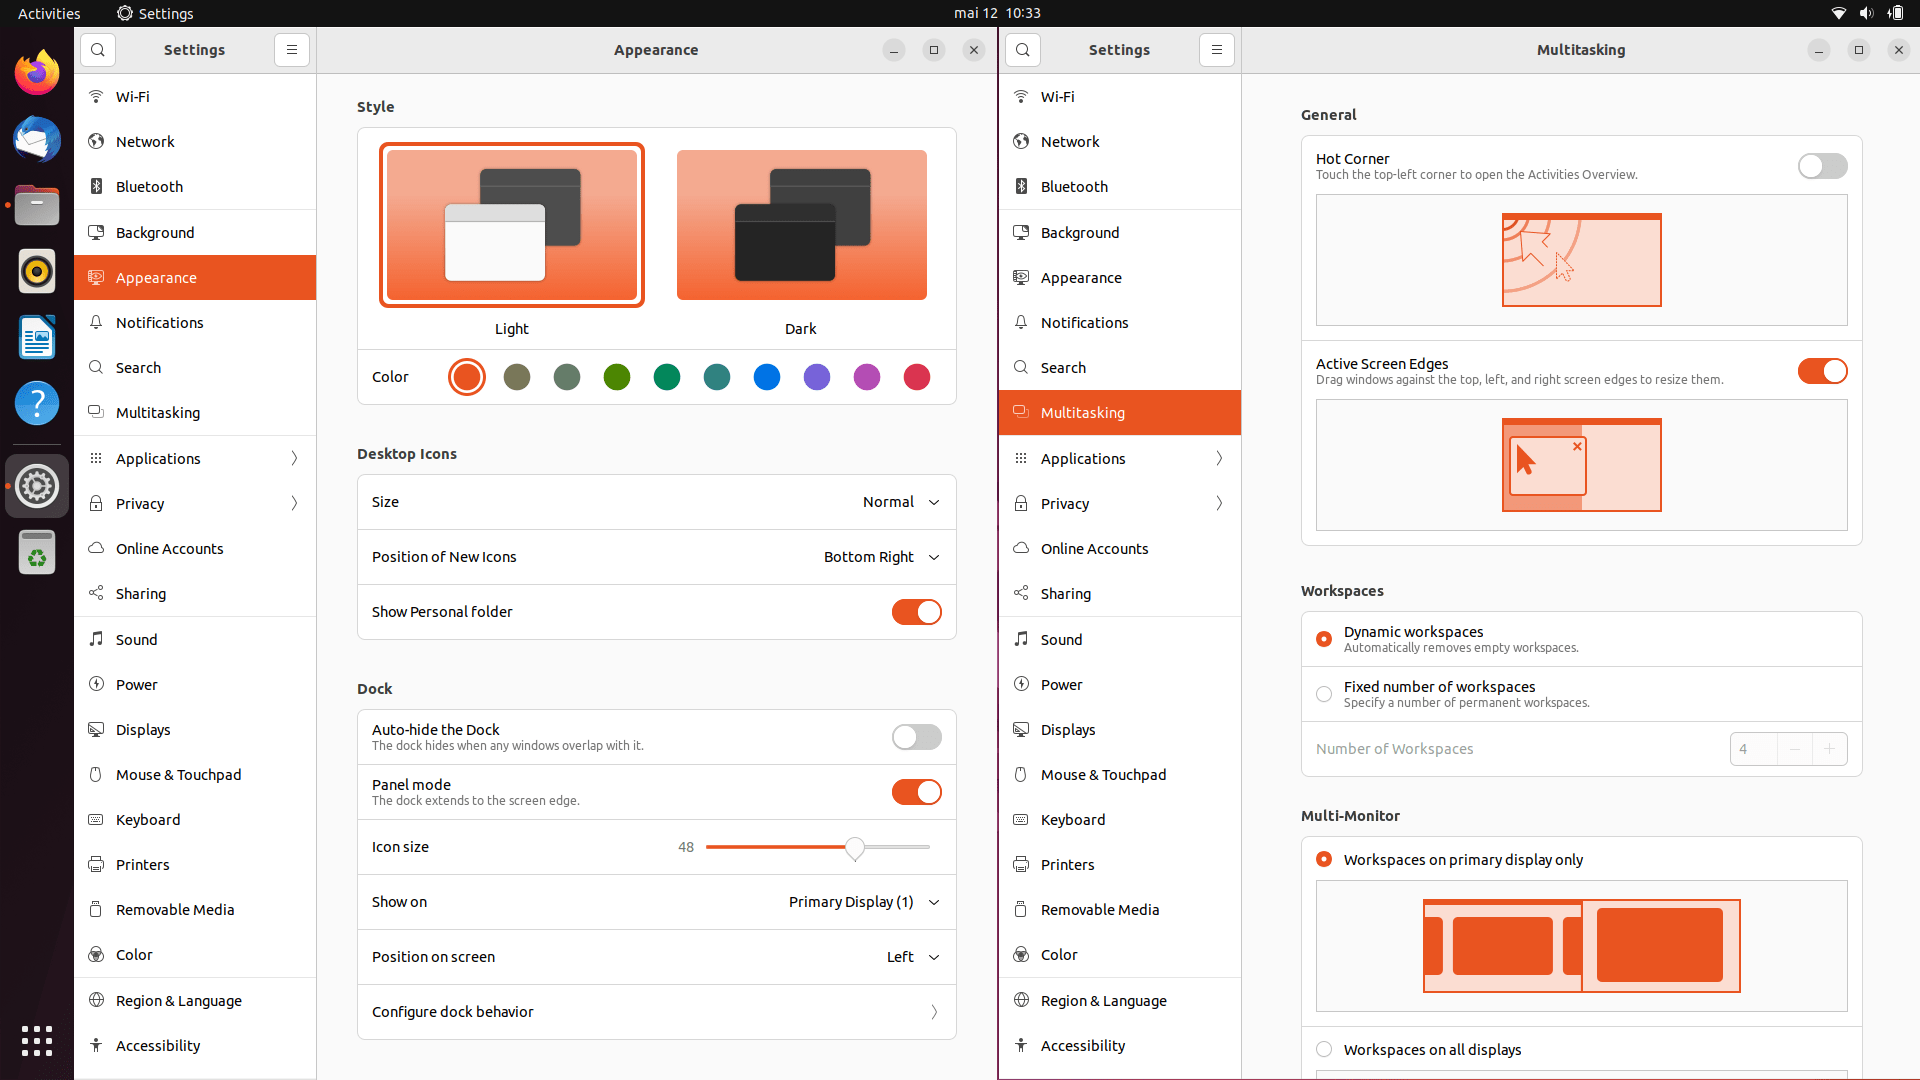
Many aspects of the GNOME Desktop can be customised in the Settings ‣ Appearance menu:
- Window style: select a system-wide light or dark theme, and choose from 10 different accent colours
- Icons: adjust the icon size or position on the Desktop, and show or hide the personal folder
- Files & Folders: open the file manager to drag & drop files or folders to the Desktop
You can fine-tune multitasking via the Settings ‣ Multitasking menu:
- Hot Corner: touch the top-left corner to open the
Activitiesoverview - Active Screen Edges: drag windows against the top, left and right screen edges to resize them
- Workspaces: choose between a dynamic or fixed number of workspaces. To switch workspace, access the
Activitiesoverview or App Launcher as described previously, or perform a three-finger right/left swipe on your touchpad
You can also record screenshots and screen recordings by pressing the PRNT SCRN button.
Finally, you can disable animations via Settings ‣ Accessibility ‣ Seeing.
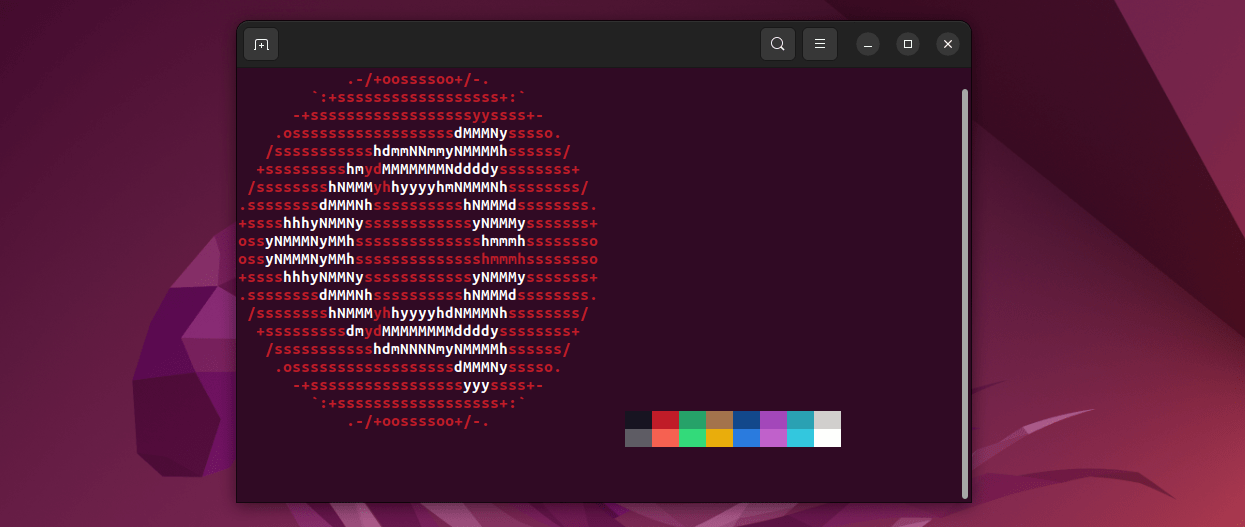
The terminal is an interface to execute text based commands. It's sometimes called shell, console, command line or prompt. Many new users are put off by the terminal, as it's often associated with some obscure code hacking. In fact, using the terminal is not that hard and can be much faster than navigating the graphical interface. Open the terminal with the shortcut CTRL + ALT + T, or click on the Activities button on the top left and search for Terminal. Here some reading material to become a terminal-ninja:

Remove Snap & install GNOME Software Center
As of Ubuntu 20.04, the traditional software center has been replaced with Snap, a new technology to deliver applications bundled inside one single file. If you prefer reverting back to the GNOME Software Center, follow the detailed instructions below.
How to remove Snap from Ubuntu 22.04 LTS
Open the terminal with the CTRL + ALT + T shortcut, or click on the Activities button on the top left and search for Terminal. Then run the following commands to stop Snap daemon services:
sudo systemctl disable snapd.service
sudo systemctl disable snapd.socket
sudo systemctl disable snapd.seeded.service
List all Snap packages installed on your system:
snap list
The output should look something like:
Name                        Version             Rev     Tracking            Publisher       Notes
bare                        1.0                 5       latest/stable       canonical       base
core20                      20220318            1405    latest/stable       canonical       base
firefox                     99.0.1-1            1232    latest/stable/...   mozilla         -
gnome-3-38-2004             0#git.1f9014a       99      latest/stable/...   canonical       -
gtk-common-themes           0.1-79-ga83e90c     1534    latest/stable/...   canonical       -
snap-store                  41.3-59-gf884f48    575     latest/stable/...   canonical       -
snapd                       2.54.4              15177   latest/stable       canonical       snapd
snapd-desktop-integration   0.1                 10      latest/stable/...   canonical       -
Next, remove each Snap package as follows:
sudo snap remove --purge firefox
sudo snap remove --purge snap-store
sudo snap remove --purge gtk-common-themes
sudo snap remove --purge gnome-3-38-2004
sudo snap remove --purge snapd-desktop-integration
sudo snap remove --purge core20
sudo snap remove --purge bare
Delete any leftover files:
sudo rm -rf /var/cache/snapd/
sudo rm -rf ~/snap
Completely remove Snap from Ubuntu 22.04 LTS:
sudo apt autoremove --purge snapd
Optionally, if you want to prevent Ubuntu from installing Snap packages going forward, open a configuration file:
sudo gedit /etc/apt/preferences.d/nosnap.pref
Add the following lines, then save the file:
# This file prevents snapd from being installed by apt
Package: snapd
Pin: release a=*
Pin-Priority: -10
How to install the GNOME Software Center in Ubuntu 22.04 LTS
Run the following command to install the GNOME Software Center:
sudo apt update
sudo apt install gnome-software
How to re-install Firefox in Ubuntu 22.04 LTS after removing Snap
After removing Snap, running the command sudo apt install firefox might return the error message firefox : PreDepends: snapd but it is not installable. To re-install Firefox, open a configuration file:
sudo gedit /etc/apt/preferences.d/firefox-nosnap.pref
Add the following lines, then save the file:
# This file enables re-installing Firefox after removing snapd
Package: firefox*
Pin: release o=Ubuntu*
Pin-Priority: -1
Add the Mozilla team repository:
sudo add-apt-repository ppa:mozillateam/ppa
sudo apt update
Finally, install Firefox:
sudo apt install firefox
How to support Snap and Flatpak packages in the GNOME Software Center
First, make sure you didn't prevent Ubuntu from installing Snap packages. If you created the file /etc/apt/preferences.d/nosnap.pref in one of the previous steps, remove it before proceeding:
sudo rm /etc/apt/preferences.d/nosnap.pref
If you want the GNOME Software Center to support Snap and Flatpak packages, run the following commands:
sudo apt install gnome-software-plugin-snap
sudo apt install gnome-software-plugin-flatpak

Ubuntu privacy settings
Under Settings ‣ Privacy, users can fine-tune privacy-related aspects such as connectivity checks, location services, history, access to external devices, screen locks or diagnostic reports. More details below.
Show me a step-by-step guide
| Privacy Settings | Description |
|---|---|
| Connectivity | Disable connectivity checking to avoid data leaks if your network communication is monitored. |
| Location Services | Disable location services to prevent applications from accessing your location. |
| Thunderbolt | Ubuntu is able to recognize devices plugged into the computer's Thunderbolt ports, such as docks or external graphic cards. If you do not use or want to use this functionality, turn it off. |
| File History & Trash | Disable file history to prevent applications from accessing a record of files that you have used. You can also automatically delete Trash content and temporary files to protect sensitive information. |
| Screen | Enable automatic screenlock to prevent others from accessing your computer while you're away. |
| Diagnostics | Disable diagnostic to prevent error reports to be sent to Canonical. |

GNOME Tweaks & Extensions
As detailed previously, Ubuntu 22.04 and the GNOME Desktop are highly customisable: wallpapers, notifications, light & dark themes, accent colours, multitasking, power profiles, etc. GNOME Tweaks pushes customisation even further: lock screen background, location of windows control buttons, startup applications, etc. GNOME extensions on the other hand add functionalities such as weather, network speed, desktop quarter-tiling, etc. More detailed instructions below.
Show me a step-by-step guide
To install GNOME Tweaks & GNOME Extensions, open the terminal with the CTRL + ALT + T shortcut, or click on the Activities button on the top left and search for Terminal. Then run the following commands:
sudo apt install gnome-tweaks
sudo apt install gnome-shell-extension-manager
Alternatively, click on the Activities button on the top left and search for Software. Now look for GNOME Tweaks as well as Extension Manager, and click on Install.

Ubuntu bug reporting
Apport is Ubuntu's bug reporting system. It intercepts crashes and files bug reports. You might want to turn it off for privacy reasons. More detailed instructions below.
Show me a step-by-step guide
Open the terminal with the CTRL + ALT + T shortcut, or click on the Activities button on the top left and search for Terminal. Then run the following commands to completely remove the bug report functionality:
sudo rm /etc/cron.daily/apport
sudo apt purge apport
To merely disable the automatic bug report while still keeping the functionality, open a terminal and type sudo service apport stop. Then open the configuration file with the command sudo gedit /etc/default/apport and set the value enabled to zero, i.e. enabled=0.

Ubuntu codecs
Codecs tell your computer how to read video or audio files. For legal and ethical reasons, some Linux distributions don't include all multimedia codecs. Sometimes it's therefore necessary to install additional codecs to view particular file formats. More detailed instructions below.
Show me a step-by-step guide
Open the terminal with the CTRL + ALT + T shortcut, or click on the Activities button on the top left and search for Terminal. Run the following commands to fully enjoy your multimedia experience:
sudo add-apt-repository "deb http://archive.canonical.com/ubuntu $(lsb_release -cs) partner"
sudo apt update
sudo apt install ubuntu-restricted-extras

Ubuntu graphic drivers
The vast majority of Linux distributions ships with open source graphic drivers out of the box. While this is sufficient to run standard applications, it's often not enough for gaming. To install proprietary graphic drivers, click on the Activities button on the top left of the screen and type Additional Drivers. Choose the correct graphical driver (most of the time, it's the default option) and restart your system.

How to update Ubuntu software
Perform regular software updates and install the latest security patches, bug fixes and application upgrades. Below more detailed instructions on how to update Ubuntu from the command line.
Show me a step-by-step guide
Open the terminal with the CTRL + ALT + T shortcut, or click on the Activities button on the top left and search for Terminal. Then run the following command:
sudo apt update && sudo apt upgrade -y
The first part of the Ubuntu update command sudo apt update checks if new software versions are available. The second part of the command sudo apt upgrade installs the newest updates. The -y at the end of the command authorises the installation of new packages.
If you prefer not to use the terminal, click on the Activities button on the top left of the screen, and search for Software Updater. It will check if there are updates available and suggest to install them.
Once the system is up to date, clean up and remove unnecessary old packages with the following terminal commands:
sudo apt autoremove
sudo apt autoclean
sudo apt clean
How to upgrade Ubuntu releases
Beyond software updates, you might want to upgrade Ubuntu from one release to the next, for example from Ubuntu 20.04 LTS to 22.04 LTS, or from 22.04 LTS to 22.10 non-LTS. More detailed instructions below.
Show me a step-by-step guide
Start by backing up your data. Then, open the terminal with the CTRL + ALT + T shortcut, or click on the Activities button on the top left and search for Terminal. Update all software packages, as described in the previous section:
sudo apt update && sudo apt upgrade -y
Next, let's find out the current Ubuntu version using the command line:
lsb_release -a
Run the following command to enable release upgrades:
sudo gedit /etc/update-manager/release-upgrades
Set the entry to Prompt=normal if you'd like to enable all release upgrades, or Prompt=lts if you'd like to enable LTS release upgrades only.
Reboot your device. Finally, upgrade Ubuntu to the next available release:
sudo do-release-upgrade -d -f DistUpgradeViewGtk3
Follow the upgrade wizard. Be patient, the upgrade can take a while. Make sure your device is plugged in and grab a coffee! Once the upgrade is complete, the system reboots and you can log in. Note that third-party software have been disabled during the upgrade and need to be enabled. Finally, make sure the upgrade was successful by checking the Ubuntu version with the command line:
lsb_release -a

Support
For further details or questions, refer to Ubuntu's documentation, Ubuntu's tutorials, Ubuntu's wiki or ask Ubuntu's beginner-friendly community for help.
